Total Pageviews

Showing posts with label babies. Show all posts

Friday, September 30, 2011

New baby Avery project!

Just thought that baby Avery needed a Halloween shirt so I made her this:

I used the same concept that the boys and I used in our bleach t shirts a few months back in this post, here...only I had to add an itsy bitsy spider to go along with it :)
Seriously go try it with your kids!!!

I've linked this project up to SO many great blogs! Please follow me to see more great projects! 20 followers and we will have an AWESOME giveaway!

*But, if you don't have timeto make this, it's for sale in the shop

Sunday, September 11, 2011

Diaper cake steps

OK, so now that you have everything you need...lets make this thing!

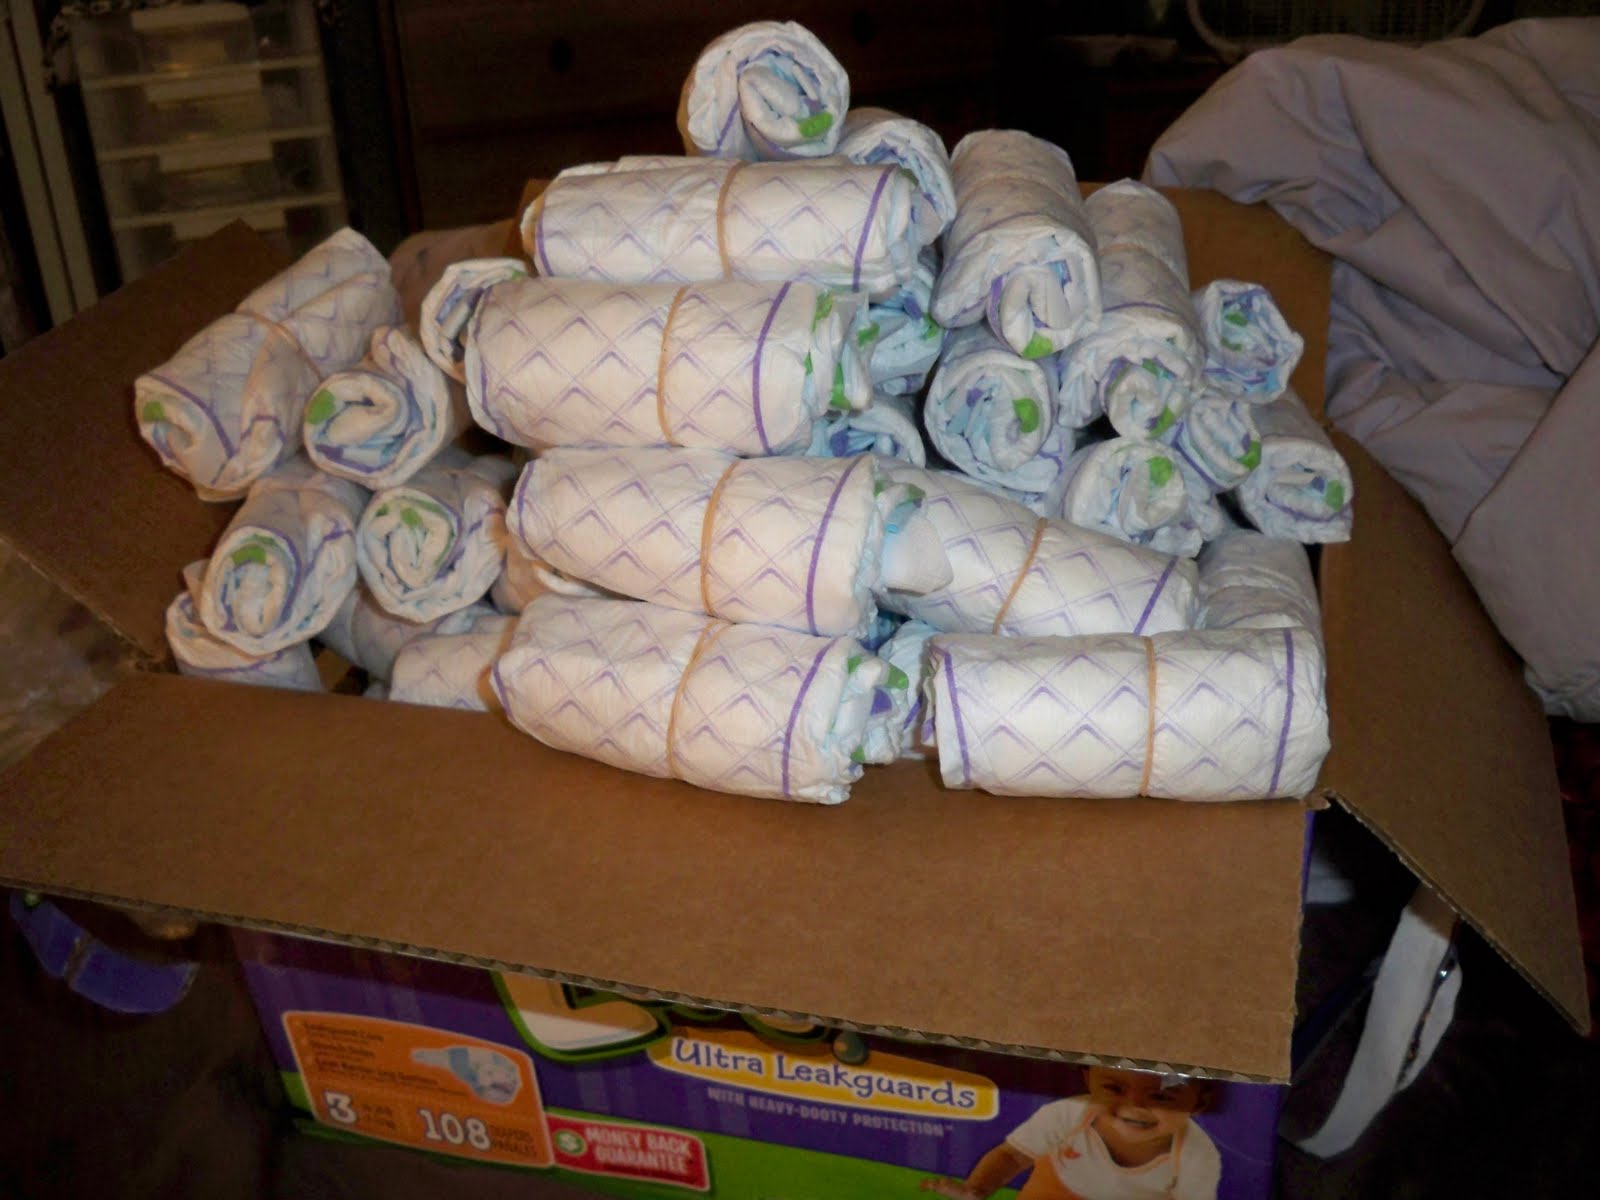
1. First things first, I roll up the entire box of diapers. For a 4 tiered cake, I used about 100 diapers. Roll the diaper design to the INSIDE if you don't want it to show, and secure with a rubber band.


(Yes, I took all of these pics in my bed. Its the easiest place for me to prop myself up so that my back doesn't hurt, and also keep the dogs from stealing diapers!)


1. Lets start stacking. I start with the bottom layer. I use one of those athletic headbands to hold the bottom layer together, it works well for me...but if you have larger rubber bands around your house then go for it! Make the bottom layer a little smaller than your base (cardboard or cheap metal pan)

3. Make the 2nd layer the same way that you did the first, but a little smaller obviously.


4. Add the 3rd and 4th layers.


5. Everything looks a little crooked right now, that's OK. At this point, put the cake on its base. Put the wooden dowel next to the cake and decide how tall you want it to be. If you don't want it to show, then cut it about 1/4 inch below the top of the cake. For this cake I wanted to glue the butterfly to the dowel, so I had it sticking up about 1/2 inch.

6. Straighten all your diapers up and add ribbons. The more the merrier. Make sure to cover all of your rubber bands because, lets face it...they're ugly! I cut the cheap headband once the bottom layer is secured with ribbon and throw it away.

7. Add all of your little baby extras. Use your imagination. Tuck them into the ribbons, tie them onto the top, etc.

8. Step back and look it over. I like to sit mine somewhere where I can see it and look at it for a good 24 hours before the baby shower. That way I can see if there are any little things that need to be adjusted or changed.


**Please use this tutorial for your own use, and do not sell or distribute items created by using this.

Diaper cake supplies


So once upon a time, I used to make diaper cakes and sell them. I was working as a nanny at the time, and this was a pretty good little side job. I also made them for every friend and family member who had a baby for YEARS.

Unfortunately, when you move 800 miles away, something that is 3 feet tall and not-so-durable is kind of hard to sell and give as gifts. Shipping diaper cakes is not very cost efficient.

Anyway, a friend and former co-worker is due in November and REALLY wants a diaper cake at her shower. I would LOVE to make it for her and baby Gabby, but it would be easier for me to teach her how to do it. So here it goes!

Supplies:
1. Diapers, I usually use size 2 or 3, so that mommy-to-be doesn't have to take it apart right away. Also remember that different diaper brands have different designs on them, so be careful. If you are doing a pretty pink pastel cake, don't buy diapers with annoyingly bright cartoon characters on them. For this cake I chose Luvs, because they have simple, purple lines on them. The monkey can be rolled into the inside so it can't be seen.

2. Rubber bands. You could go to Walmart and buy a "variety" pack of rubber bands, but you won't be able to use half of them. I find it a lot easier to pay $1 or 2 extra and get a whole pack of the same size at Staples or Office Max.

3. Wooden dowel. 1/4 inch. Usually about 70 cents or less at Michael's, Hobby Lobby, etc.

4. Cake "base." Sometimes I use cardboard cake circles that can be found at party stores for less than $1. Unfortunately, I haven't found anywhere local here in Chicago that sells them individually...only in packs of 5. This time I went with a cheap, metal pizza pan from Walmart for $3. You can also find a smaller version at some dollar stores. I needed a BIG base, and I didn't feel like driving all over creation to find one, so I just got the Walmart one.

5. Ribbon. Lots of ribbon. I like to use at least 5 different ribbons of different widths. I chose the ribbons for this cake based off of this one cool, striped ribbon and the butterfly that I wanted to use for the top.


6. Washcloths, pacifiers, sunglasses, baby lotion, baby shampoo, infant tylenol, socks, blankets, etc etc etc For this cake I didn't use a lot, just washcloths to make the bows, but I have made some that are just STUFFED with cute stuff for mommy and baby.

Thursday, September 8, 2011

Avery's loot

As I had said before, Miss Avery was going to be SPOILED by her Auntie Emily when I visited last month. I could have gotten away with just carry on luggage if it hadn't been for all of the baby stuff I had to cram inside!


Lucky baby! I have literally been collecting things since the minute I found out that Katie was pregnant! I made the purple peacock onesie, and the tie dye onesie with a swallow on it. The other onesies were purchased from awesome sellers on etsy.com

Saturday, September 3, 2011

Sweet baby Avery!

Finally met this beautiful baby girl when I was in Virginia. I can't believe Katie MADE her!! She is absolutely gorgeous and SO good! Katie is  pretty amazing herself, she  is a natural and being a momma!